
You Need:
Shoes- (leather or rubber, I don't think suede or velvet will hold as well)
I found these great Beige Pumps at K-Mart- CLICK HERE)

Iron on studs- (Like these- Click HERE)
Strong Glue- (Like E-6000- Click HERE) [Warning be in a well ventilated area the fumes are pretty strong and don't let this dry on anything you don't want it to!]
Scissors-

Here we go!
Make sure the surface of your shoes are clean & dry. Peel studs from backing. The tops of the studs will still be on a film, use that film to layout your design.

Remove from shoe, trim film, adjust studs on film if needed and add dots of glue to the cups of the studs.

Place film back on shoe. Stick film to shoe to hold studs on while they dry. (Thank goodness for the film or I would have been holding A LOT of studs on) Remove film carefully after 45 minutes. If the glue still isn't dry (adjust studs back to their place and add more glue if needed) ALLOW to completely dry for at least 12-24 hours.

**If you get glue where it shouldn't WIPE with a wet rag or paper towel then rub with finger tip to remove residue.
Here they are!

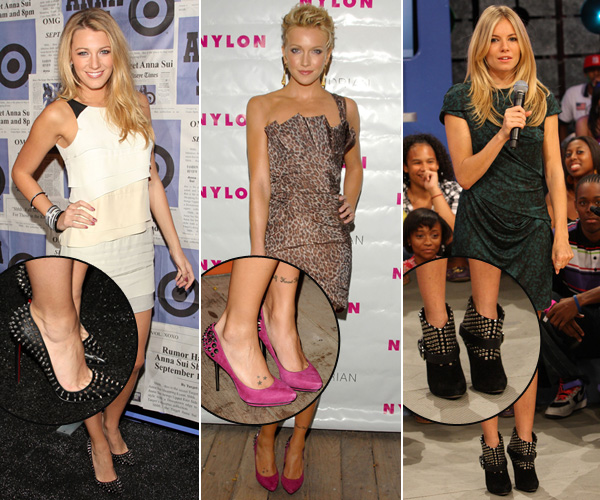
I did studs on just the outer backs of the heel and 2 off balanced rows on the toe. You can cover the whole shoe, just do straps, stripes, around the heels, only on the toes. WHATEVER! STUDS are here to stay, here's some pictures for inspiration and this is a great way to breath new style into old shoes.


HAVE FUN! BTW some rhinestones & studs would look awesome on your summer flip flops!
No comments:
Post a Comment